The original Polaroid flashgun #268 was designed for disposable flashbulbs. These flashbulbs could only be used once and were not produced for a long time. The only option to buy them would be ebay, garage sales, etc.
Sure, it's possible to use a modern electronic flash with Polaroid, but it's not fun, I wanted to preserve the authentic look. So I got myself the original flashgun (luckily this thing doesn't have any collectibles value, I got mine for $5 on the ebay) and retrofitted it with modern electronic flash.
Disclaimer: Danger, danger, high voltage! This device produces a potentially dangerous high voltage even after the battery is disconnected. If you managed to kill/injure/scare yourself, your GF/BF, buddies, pets, parents, etc. I am not responsible for it in any ways.
My Polaroid Land 440 with original flash


Flash exploded

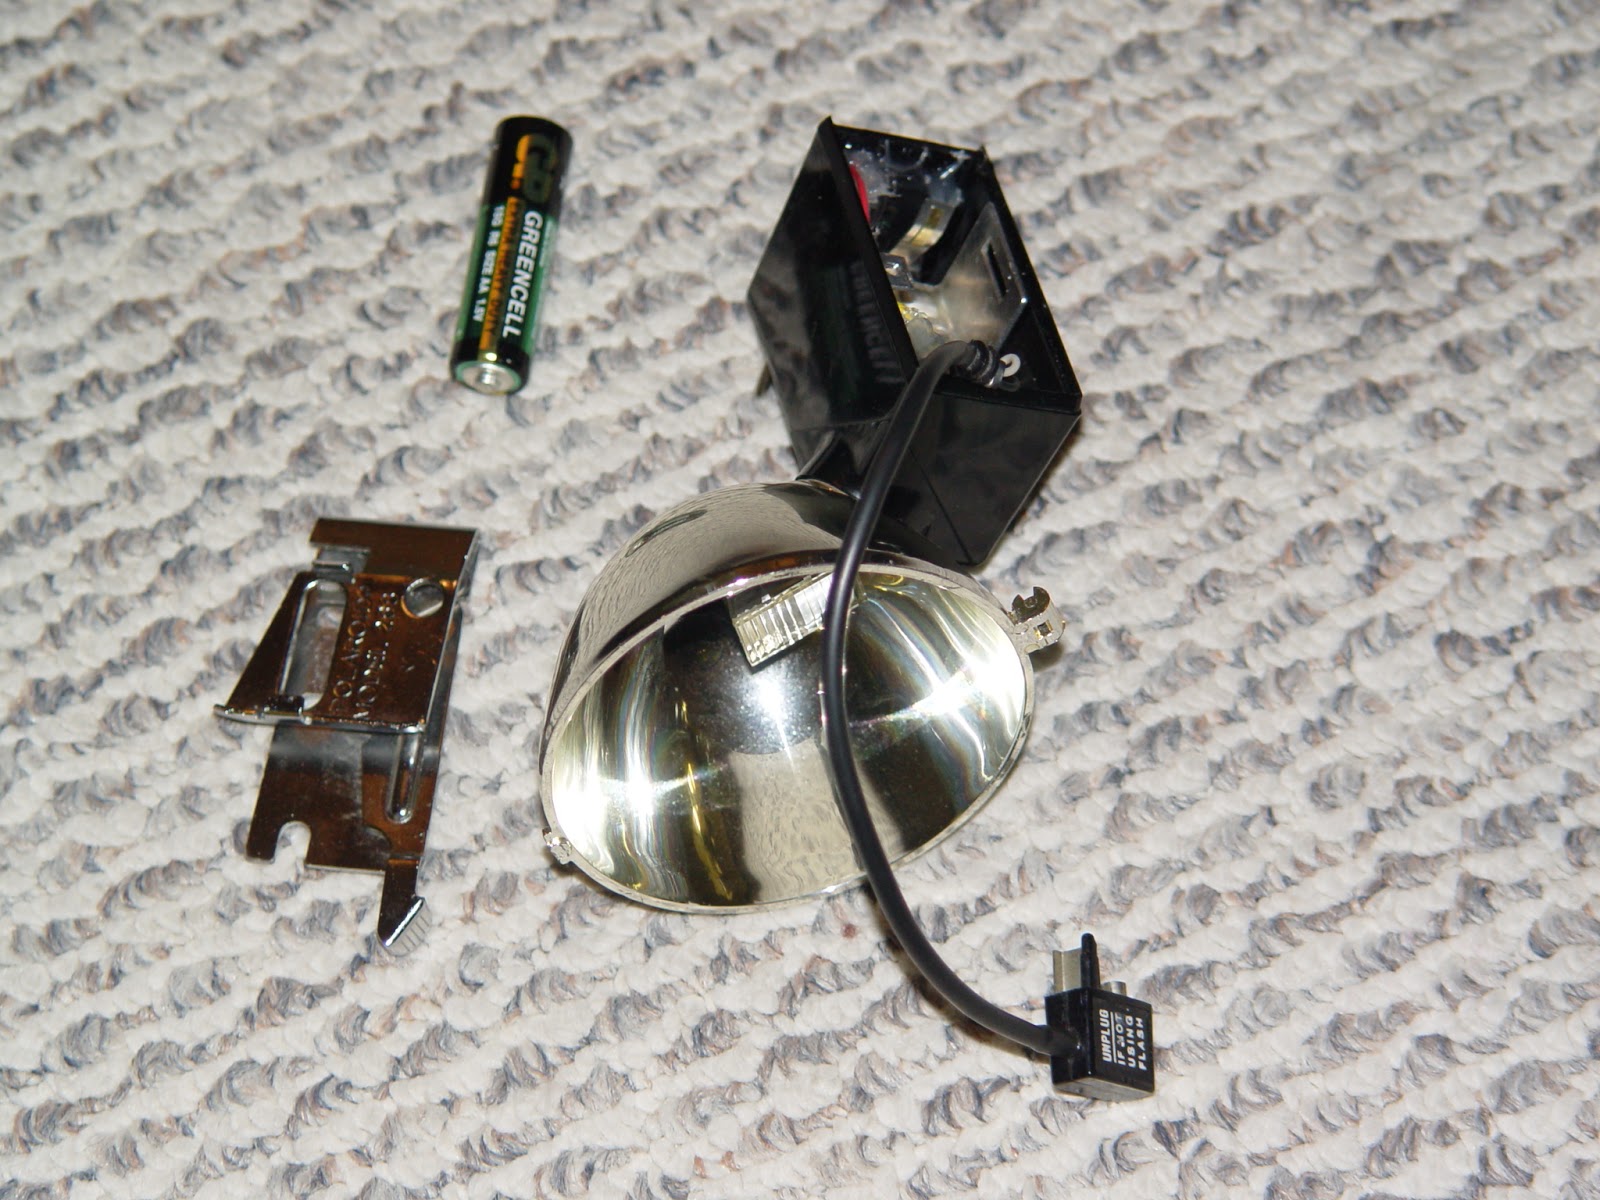
Electronic flash from the disposable camera. I got this, although anything similar should work.


I kept the same schematic as it was. I definitely drew it somewhere, but can't find it. Fortunately this PCB is so simple, you shouldn't have any problem making the schematic of it. Connectors on the board are also obvious:
The PCB was too big to fit into the case, so I split it into two smaller boards:
Rest of it is just wires to make an original schematic.


Hot-glue everything together!

It runs of the single AA battery

Done

Video


Sure, it's possible to use a modern electronic flash with Polaroid, but it's not fun, I wanted to preserve the authentic look. So I got myself the original flashgun (luckily this thing doesn't have any collectibles value, I got mine for $5 on the ebay) and retrofitted it with modern electronic flash.
Disclaimer: Danger, danger, high voltage! This device produces a potentially dangerous high voltage even after the battery is disconnected. If you managed to kill/injure/scare yourself, your GF/BF, buddies, pets, parents, etc. I am not responsible for it in any ways.
My Polaroid Land 440 with original flash

Original flash itself

Flash exploded

Electronic flash from the disposable camera. I got this, although anything similar should work.


I kept the same schematic as it was. I definitely drew it somewhere, but can't find it. Fortunately this PCB is so simple, you shouldn't have any problem making the schematic of it. Connectors on the board are also obvious:
- battery holder - AA battery
- metal tab switch - power on/off
- black and red wires - trigger (sync contact)
The PCB was too big to fit into the case, so I split it into two smaller boards:
- Cut-off a piece of the original PCB (around the charge transformer/transistor) to make a main charging circuit. The diode is not on this board, it is inside the heat shrink tube and soldered inline with the yellow wire (which is connected to the "-" of the main capacitor).
- Made a tiny trigger PCB (it has only HV transformer, capacitor and resistor) on the tiny piece of the perfboard. Neon lamp is wired outside of the board with current limiting resistor inline with the purple wire (the resistor is inside the heat shrink tube)
Rest of it is just wires to make an original schematic.


Hot-glue everything together!

It runs of the single AA battery
Done

Video
Poorly scanned pictures taken with this flash


hey , this is awesome , I love it
ReplyDeleteCan you make one for me , I will Buy it
My e-mail : manlung6023@yahoo.com.hk
Thank you for the comment.
ReplyDeleteUnfortunately, I am not planning to make another one (for multiple reasons).
Sorry.
Hey Boris. Thank you for this tutorial but I'm noob at the schematic or circuit. I have these broken camera and already salvaged the photo flash. Now, I'm clueless. I only know the wire that connects the battery. If you care to share the wires is for what, please email me at puzzlemess@gmail.com.
ReplyDeleteThank you.
I am sorry, I can't tell which wire is which, it all depends on the particular camera you are using.
DeleteHi there, one short question. Maybe you could rechekc the pictures in this blog and reupp some are missing. Indeed i'm also wondering if the flas works corrcetly. From my personal view it should not be enough flash power to get correct exposure. The M3 bulbs are similar to my Jinbei DC1200 Porty with 1200Ws output… are the pictures correct exposed with this small flash?
ReplyDeleteHm, I am not sure what pictures are missing, all pictures seem to be displayed correctly.
DeleteI am not expecting the light output of this flash to match the original lightbulb, this wasn't a goal of the project.
The goal was to fit an electronic flash into the original case and it was a success.
Since you are curios, I added couple pictures taken with this flash.
heys, i've painstakingly bought the same flash system as you did, could you please add abit of details about the wire connections? thank you very much.
ReplyDeleteI modified the post a bit to add more details about the schematic. Hope it'll help.
DeleteHi Boris, this project is really impressive. I got the exact same strobe and flashgun but i cant figure out how to connect the parts after cutting the board. Can you draw a simple diagram to show how its done? I cant really tell from the pictures :/ Your help will be greatly appreciated! thanks!
ReplyDeleteMy email is daron.chua.92@gmail.com